Search

Hand Washing

Teach Kids Hand Washing for Kids Lesson Plan

Children will learn that proper handwashing prevents the spread of germs. Children will learn the proper steps and sequence for handwashing and learn that frequent and proper handwashing is an important habit.

Text saying "hooray for clean healthy hands"

Download the Hooray for Clean, Healthy Hands Lesson Plan

icon of a PDF

Goals and Skills

Children Will:

  • Demonstrate how keeping hands clean reduces the spread of germs
  • Explain and demonstrate proper handwashing procedures
  • Express their ideas about germs through art


Supplies and Preparation:

  • Construction paper
  • Art supplies (e.g., poster paper, color markers, crayons, markers, chalk, non-toxic ink stamps, finger paint)
  • Make copies of the Clean Hands Up, Dirty Hands Down handout (last page of PDF)
  • Download and make copies of LYSOL®’s handwashing poster


Background for Teacher

Learn more about the prevention of germs on hands and surfaces at lysol.com/HERE. Visit the CDC’s general handwashing information at cdc.gov/handwashing/. You can also access CDC’s germ stats and scientific information at cdc.gov/handwashing/show-me-the-science.html.


For tips on how to keep hands and surfaces clean in your classroom, download the tip sheet as well as the handwashing poster, which you can display above the sink. We encourage you to make the lesson plan your own to fit the needs and ages of the children in your classroom.

Instruction Steps

Clean Hands, Dirty Hands

Through this creative arts and crafts project, children will make drawings representing clean and dirty hands. Begin by recapping that germs can live on surfaces like the door knob, toilet handle, and faucets, and when we touch these items, germs spread to our hands. We don’t want these germs to get inside our body, so we wash our hands often.


Explain that germs are too small to be seen, but are usually hidden in our hands, especially in between fingers and underneath our nails. Ask children to stretch out their hands so they can see the different areas of the hands that need to be washed.


Point to the front of your hand and ask all of the children to show you the front of their hands. Then, continue with the back of the hand until you have covered the fingers, wrists, palms, and thumbs. Use positional words such as “top,” “bottom,” “under,” and “in between” to direct the children.


After reviewing the different areas of our hands, explain that they will now color pictures of hands to show what clean hands and dirty hands look like. Provide each child with a copy of the Clean Hands Up, Dirty Hands Down handout. Explain that they will be imagining what germs look like on our hands. They can choose from a range of art supplies including markers, crayons, and finger paint to draw, color, stamp, or paint colorful images of germs on the dirty hand. Invite the children to be creative. Encourage them to show how germs can be found all over our hands, including areas such as our wrists, in between the fingers, and under our nails.


Movement Activity

Review how germs can live on our hands and surfaces and how we pick up germs when we touch dirty surfaces or sneeze without covering our mouths. If we touch other people without washing our hands, we can pass germs on to our friends and families. Explain that we will learn to wash our hands properly to keep our hands clean and germ free. Begin with a fun game of Simon Says. Give instructions for different hand movements. Some examples can be found below.

Child turning on faucet


Explain that you are going to show everyone how to wash their hands properly by following five important steps.

Young child holding up dirty hands and smiling

Handwashing Demonstration

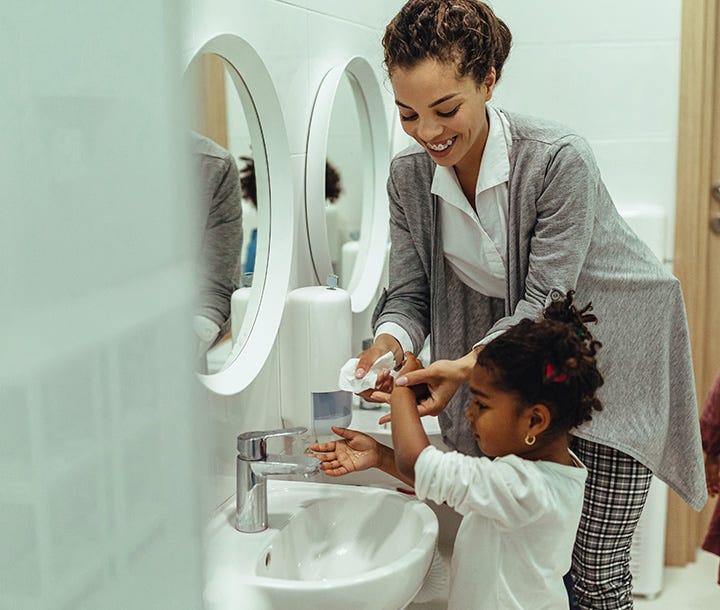
What do we need to wash our hands? Ask children to brainstorm items needed like water, soap, and paper towels. Explain that next they will learn and practice good handwashing because good handwashing gets rid of germs and keeps our hands clean. Project or display the LYSOL® handwashing poster on the board. Indicate that there are five steps. Model each step separately. Then, go through the five steps all together.


  1. Get Wet: Motion turning on the water, wetting hands, and turning off the tap.
  2. Soap It Up: Show students how to apply soap and lather the tops and bottoms of their hands, their wrists, and in between their fingernails.
  3. Scrub, Scrub, Scrub: While scrubbing, explain that they should scrub for at least 20 seconds in order to rub off all of the germs on their hands. Tell them to sing a song to help keep time. Sing the “A-B-C” song to model this step.
  4. Rinse Well Motion turning on the tap and rinsing well.
  5. Dry Off: Motion drying with a clean paper towel.


Next, invite children to act out each step as you read aloud. Then, invite a volunteer to show the class the steps and sequence for proper handwashing. Finally, have each child wash their hands, checking to see that they are following the proper steps. You can also review the steps by watching the CDC’s video Wash Your Hands available at cdc.gov/cdctv/healthyliving/hygiene/wash-your-hands.html.


It is recommended you schedule this activity before a mealtime or after playing outside so you can observe children’s handwashing during your routine handwashing.


Review

Provide each child with a copy of the LYSOL® handwashing poster. Invite children to share their observations. Prompt children by asking: “Why is it important to follow these five steps?”, “Why do we sing a song while we scrub, scrub, scrub?”


Extend the Lesson

Experimenting is a great way for young children to begin developing important predicting and observing skills for scientific reasoning. In this experiment, children can compare ineffective handwashing methods with proper handwashing to learn the importance of following the proper steps and sequence for handwashing.


Begin by asking, “Why do we need soap and water to wash our hands?” Set up plastic spoons, each dipped in an oil-based substance (either vegetable oil, Vaseline, or butter) and covered in cinnamon or glitter.


Invite children to experiment with rinsing the spoon for 10 seconds or stirring the spoon in a small cup to simulate rinsing. Repeat this step, but modify each attempt by increasing the rinsing time to 20 seconds and then again by adding soap.


Finally, follow the proper handwashing procedures. Dip the spoon in water, then lather with soap and rub the spoon for 20 seconds; finally, rinse the spoon well and dry it off with a paper towel. Invite students to share their observations.


If you can, provide a magnifying lens to encourage children to inspect the spoon and explain that like the cinnamon or glitter, germs are tiny and sometimes we can’t see them, but they are there.


Home Connection

Share a copy of the LYSOL® handwashing poster with parents. Inform parents about today’s lesson and ask them to check that their child is following the proper handwashing procedures. As a family, they can choose a song to sing when they wash their hands. This will encourage children to follow the handwashing procedures at home and develop good hygiene habits.

Download the Hooray for Clean, Healthy Hands Lesson Plan

icon of a PDF

Explore More Resources For COVID-19 in Schools