Search

Prevent Germs From Spreading

Prevent the Spread of the Coronavirus (COVID-19) Lesson Plan

Students will learn that tiny germs can be spread both in the air and on surfaces. In this lesson, students will learn that wearing a facemask can help prevent the spread of germs and help keep others from getting sick.

Download the Virus Stops Here Lesson Plan

icon of a PDF

Goals and Skills

STUDENTS WILL:

  • Understand that germs can be spread by coughing, sneezing, or touching
  • Understand that one way to help prevent the spread of germs is by wearing a facemask
  • Create a facemask to wear when social distancing is not possible
  • Demonstrate the proper way to wear a facemask


SUPPLIES AND PREPARATION:

  • Bandana, old T-shirt, or cotton cloth
  • Rubber bands (or hair ties)
  • Scissors
  • Ruler
  • Paper
  • Art supplies for extension activity


BACKGROUND FOR TEACHERS

Visit the CDC’s Get the Facts About Coronavirus guide to learn more about the spread of COVID-19 and the importance of wearing face coverings. This site also discusses what you need to do at home and when going out in order to stay safe. https://www.cdc.gov/coronavirus/2019-nCoV/index.html

Instruction Steps

ENGAGE

 Spark student interest by asking the following questions:

  • What is a germ?
  • How do germs spread from one person to another?
  • What are some ways we can stop the spread of germs?


EXPLAIN

Germs are living things that are found all around the world. They are so tiny that we need a microscope to see them! When germs enter our bodies, sometimes they can make us sick with an illness.


Germs can spread from one person to another through little droplets when someone coughs, sneezes, or even talks! If we touch our eyes, nose, or mouth, these droplets can enter our bodies and sometimes make us sick. When we touch different surfaces with our hands, we are also spreading our germs. These germs can remain on a surface from a few hours to several days.


DISCUSS (ALL GRADE LEVELS)

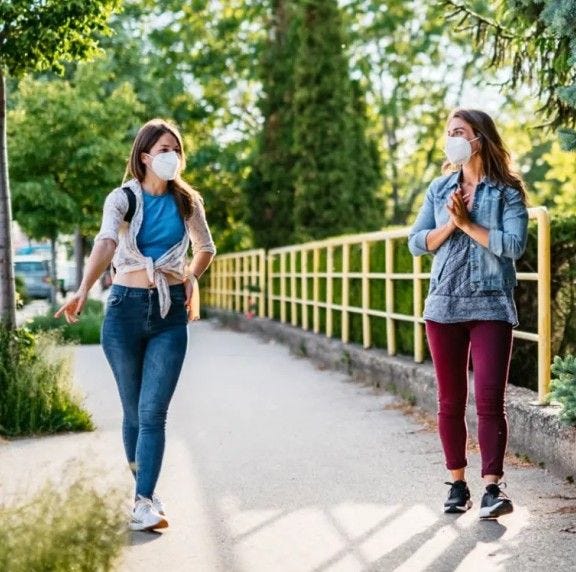
 Tell students that when we cough or sneeze into the open air, our germs can sometimes spread to other people. One way to help prevent the spread of germs is by wearing a facemask.


Facemasks make a barrier (like a wall) that helps prevent germs from traveling into the air and onto other people or surfaces when we cough, sneeze, or talk. Germs are more easily spread when we are close to another person. Sometimes, people can be sick and not even know it. When we wear a mask, we can help prevent someone else from getting sick because our noses and mouths are covered, which helps stop our germs from getting into the air.


Demonstrate to students how blowing air on a piece of paper will cause the paper to move. Then, give the same demonstration to students while wearing a facemask. Make note of how the paper does not move. Explain to students that like the paper, when we wear a facemask, germs do not move onto other people.

Cartoon with one child wearing a facemask properly and three who are not

SOME DOS AND DON’TS ABOUT FACEMASKS

Talk to students about some important rules when it comes to wearing facemasks.

  • DO wear a mask that covers your nose and mouth to help protect others in case you are sick, but do not have symptoms
  • DO wear a mask in public settings when you’re around people that you do not live with
  • DO wear a mask correctly
  • DON’T put the mask around your neck or up on your forehead
  • DON’T touch the mask, and if you do, wash your hands or use hand sanitizer to disinfect


CREATE - PRE-K

 Distribute the PreK Facemask Handout (page 5 of the PDF). Have students take the facemask and place it correctly over the smiley face to demonstrate the proper placement of a facemask. Tape the facemask to the smiley face. Students may color the picture when complete.

Reiterate to students the importance of a properly placed facemask. 


CREATE- GRADES K-1

 Have students create a self-portrait of themselves wearing a mask. Using the handout found on page 6 of the PDF:

  • Have students illustrate themselves using the face template on the top half of the paper
  • In the middle section, have students write their name
  • In the bottom section (with the facemask), students will decorate their own facemask
  • Then, have students fold the facemask section over their name like an accordion so that the facemask is over the self-portrait


Students should be able to flip back and forth to see their self-portrait with and without a facemask.


Review the importance of wearing facemasks. Using the Comic Strip Handout (page 7 of the PDF) have students create a comic strip story about the importance of wearing facemasks and how they can help prevent the spread of germs.


CREATE- GRADES 2-3, 4-5

Get your students to create their own facemasks by following these instructions.

  1. First, use your ruler to measure out a piece of cloth 20 inches by 20 inches (for younger students, you will want to make sure the cloth is already measured and cut).
  2. Fold the cloth in half from top to bottom (hamburger style).
  3. From there, fold the top down to the middle of the cloth and the bottom up to the middle of the cloth.
  4. Place rubber bands or hair ties over the cloth about six inches apart. Fold sides to the middle and tuck them in
  5. Place rubber bands (or hair ties) over ears, making sure that the mask covers both the nose and mouth. The facemask should be tight, but comfortable. 


HOME CONNECTION

Have each student take their facemask home to demonstrate to their parents how to properly wear a facemask and the reasons why we should wear them.

Download the Virus Stops Here Lesson Plan

icon of a PDF